Mcspiedoboston now shares with you the article The Easiest Way to Make the Fanciest Cake on our Food cooking blog.
- The Funky, 3-Ingredient Tuscan Sauce That’s Ready in Less Than 5 Minutes
- Lisa Says Gah’s Recipe for Success: Slow Fashion, Sustainability & Snacky Prints
- How Supply Chain Issues Are Affecting Food Pantries
- A Peach Cobbler That’s Maybe Cake and Definitely Bakes in a Pool of Butter
- How the Easy-Bake Oven Has Endured 53 Years and 11 Designs
Bạn Đang Xem: The Easiest Way to Make the Fanciest Cake
Inspired by conversations on the Food52 Hotline, we’re sharing tips and tricks that make navigating all of our kitchens easier and more fun.
Today: Making a dressy dessert doesn’t need to be difficult — here’s how to make a fancy shmancy cake that tastes as good as it looks.
My favorite thing about cake is finding ways to decorate it that taste as good as they look. I never want someone to slice into a cake I’ve made only to discover that the carefully crafted exterior tastes like cardboard. Which is why I’ve loved decorating cakes with chocolate (just melted chocolate!) for as long as I can remember.
Let’s start off by being honest: This method is a little bit messy. But it’s worth it, because what it lacks in precision and cleanliness, it makes up for by being super, incredibly easy and really beautiful when it’s all finished. Basically, rather than frosting the cake, you wrap it in melted chocolate and let it set.
Here’s how you do it:
Bake a tall cake. I like to use this technique for a single cake, not a layer cake. I bake a full recipe of cake in a deep pan (like a 3-incher). A deep cake like this takes longer to bake, but again — you’re not frosting it, so you’ll make up the time difference. Plus, it looks really dramatic when you slice into it. Once you’ve baked the cake, let it cool completely.
Xem Thêm : The Dorie Greenspan Cake We All Should Know
Make your wrap. Cut a piece of acetate paper or parchment paper to be about 1 inch taller than the cake and wide enough that it will wrap all the way around. If your paper isn’t long enough, don’t worry — just tape it together securely to make it long enough to wrap all the way around, plus a little extra.
Note: Acetate paper is available online or at baking supply stores. You don’t need it, but it’s a fabulous baking tool — it imparts a fabulous shine onto anything you use with it, plus it’s clear so you can see what you’re doing. But I’ve tested this technique with parchment and wax paper, and both work fine!
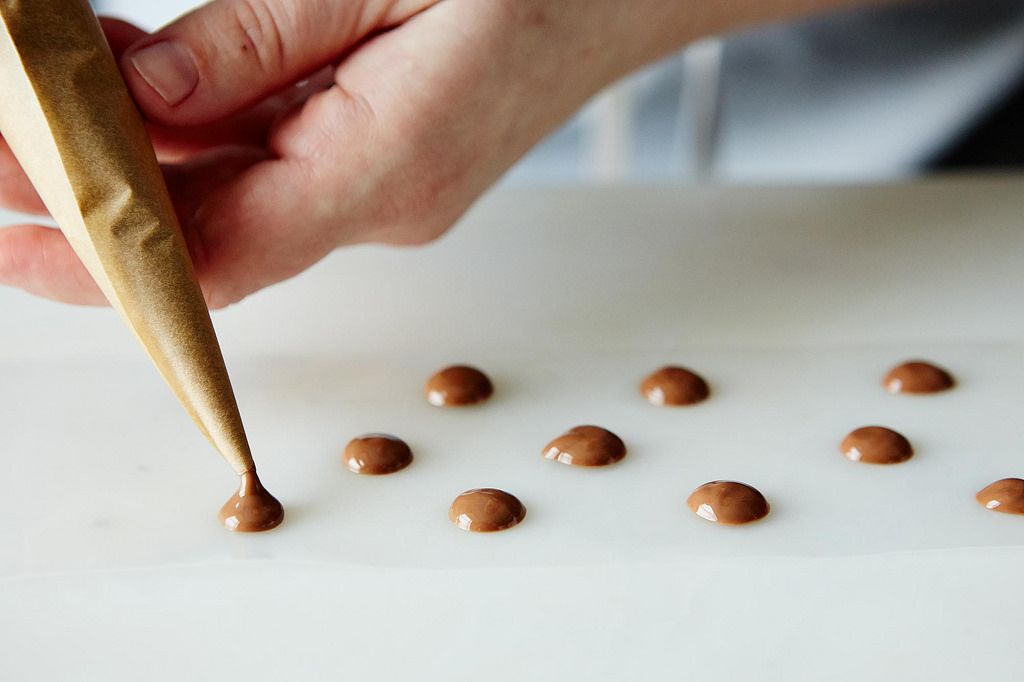
Make a design. I like to use multiple colors of chocolate (milk, white, dark) to make a design or pattern on the paper before I apply the actual coat of chocolate. On this cake, I used a parchment cone to pipe milk chocolate polka dots across the wrap. No need to be precise or anything — just do what moves you. White chocolate drizzles or stripes also look very cool. Let this layer set at room temperature (or speed it up by throwing it in the fridge) until it’s almost firm to the touch.
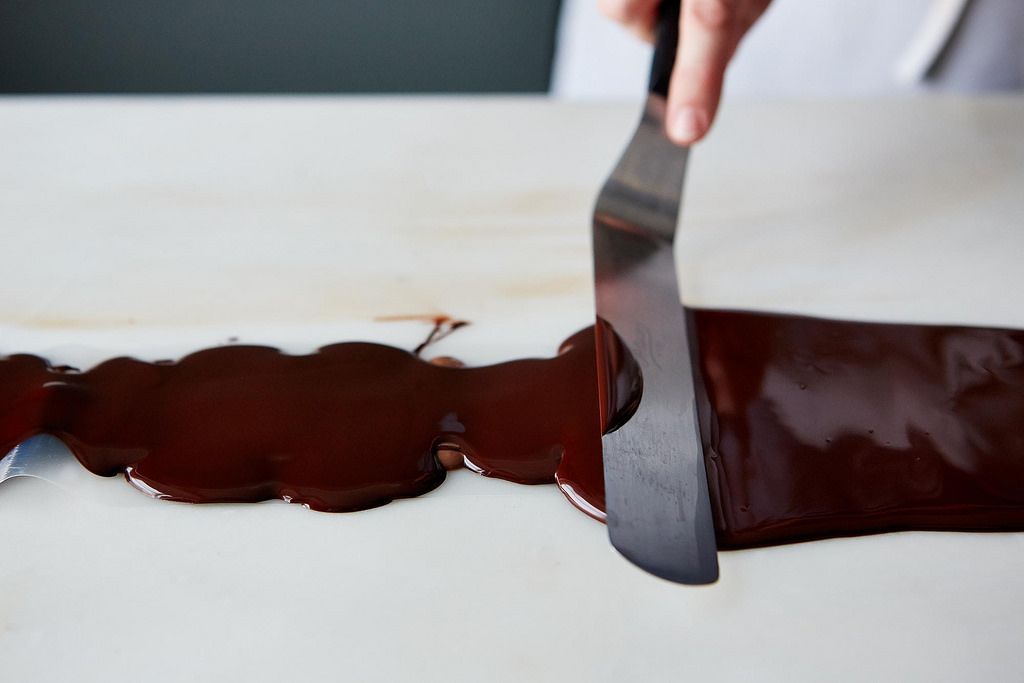
Spread melted chocolate onto the wrap. Pour a line of melted chocolate down the center of the wrap and use an offset spatula to spread it into an even layer. Let it set for a few minutes to start to firm up (and just generally be less liquidy). The chocolate doesn’t need to be — and shouldn’t be — tempered here: It will make it easier to slice through if it’s soft. However, you should plan on refrigerating the cake if you’re making this on a warm day. In the winter, it will be fine at room temperature once the chocolate is set.
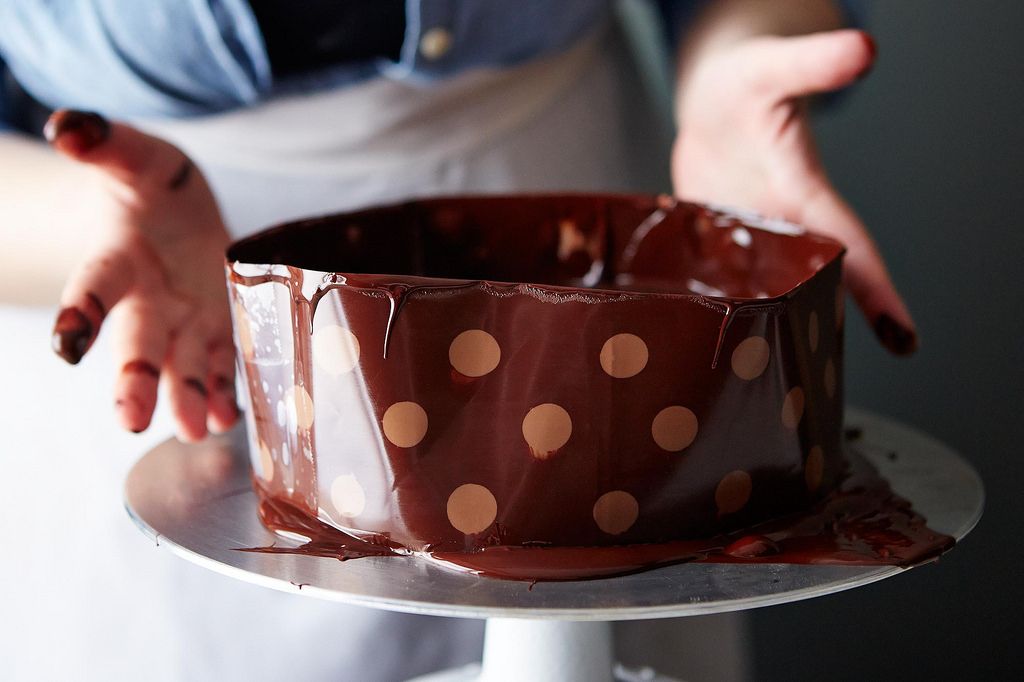
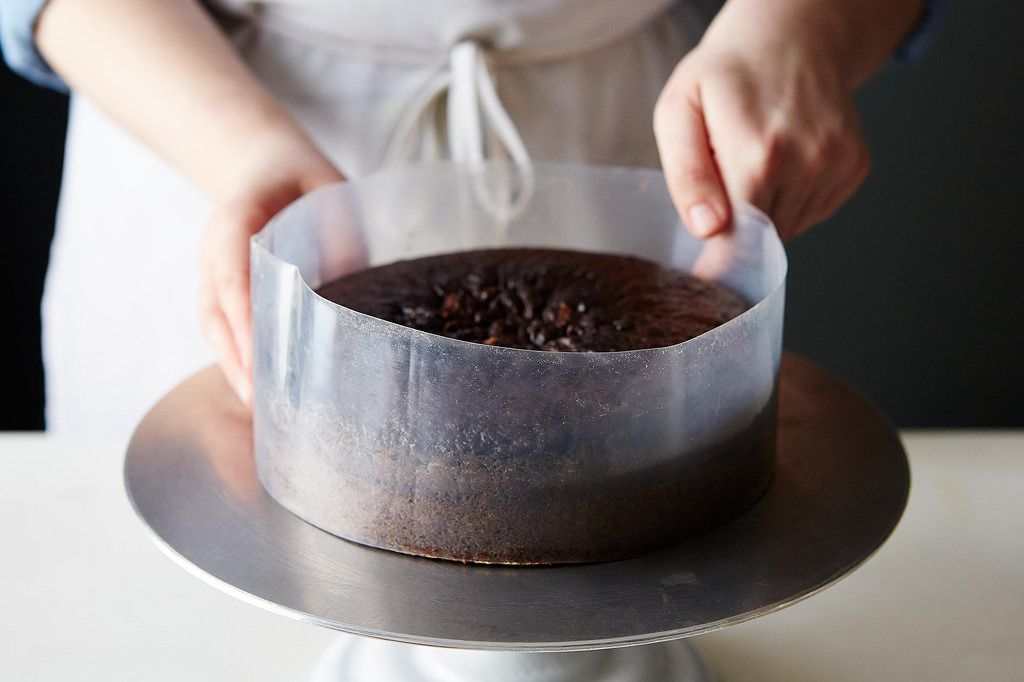
Wrap that cake. Working quickly, lift the paper off of your work surface and wrap it around the cake. It’s best to start with the middle of the wrap (pressing lightly to adhere it to the cake), then working your way around to the ends. You’ll want to make sure that one end of the chocolate layer is pressed directly into the cake while the other is pressed on top of it, overlapping — this will help the whole thing “seal” together. This is the messy part — some chocolate will drip down, and it will probably get on your hands, but don’t worry — the mess won’t be visible on the finished product. Transfer the whole cake to the refrigerator and let it sit until the chocolate sets.
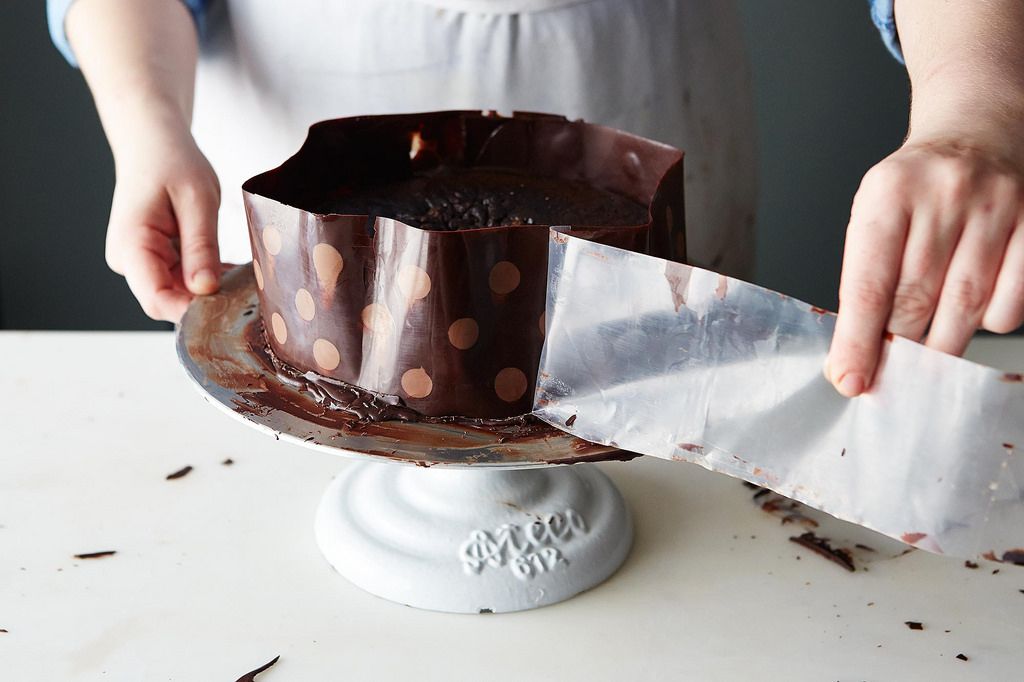
Remove the paper. Find the end of the paper, and use a paring knife to loosen it — don’t worry, this piece is extra (it’s the last part of the wrap sitting on top of the other end), so it’s okay if a little piece breaks off. Once the paper is visible, start to pull, unwrapping the cake and leaving the chocolate behind. Run the knife or an offset spatula around the base of the cake — some extra chocolate may have accumulated here — and just let it fall away as you run your knife around. Then, you can transfer your cake to a cake stand.
Xem Thêm : This Woman in China Might Have the Least Sad Desk Lunch in the World
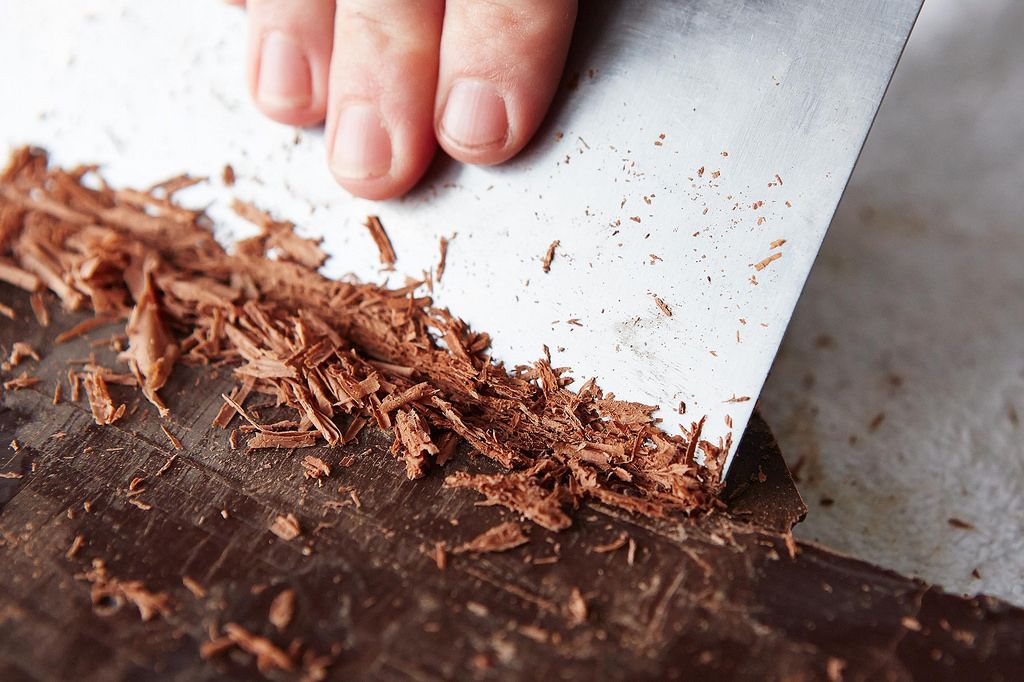
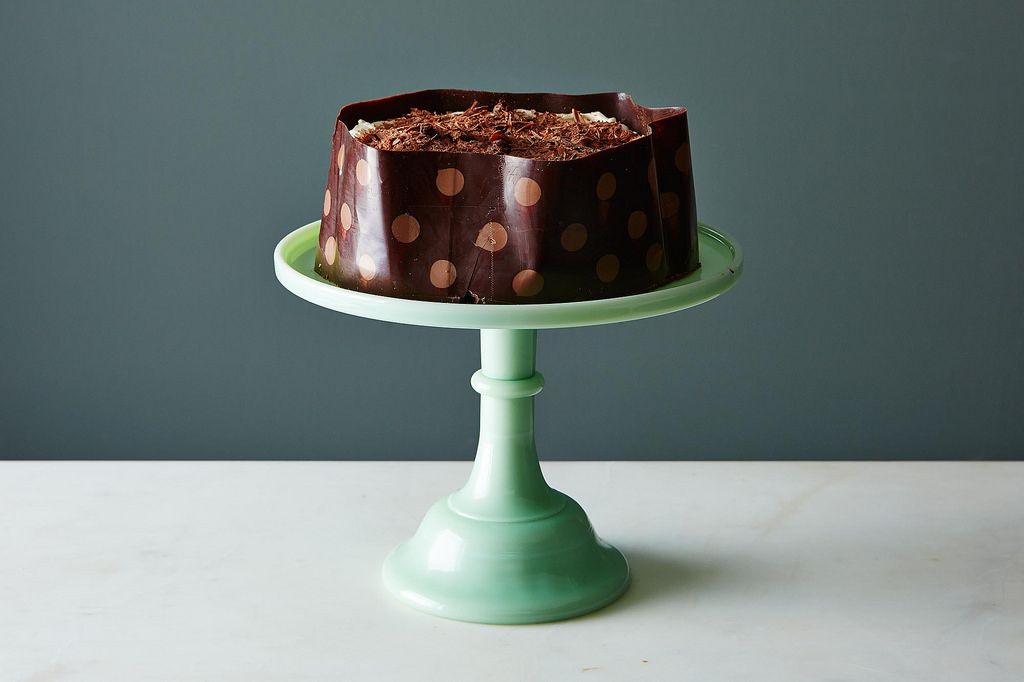
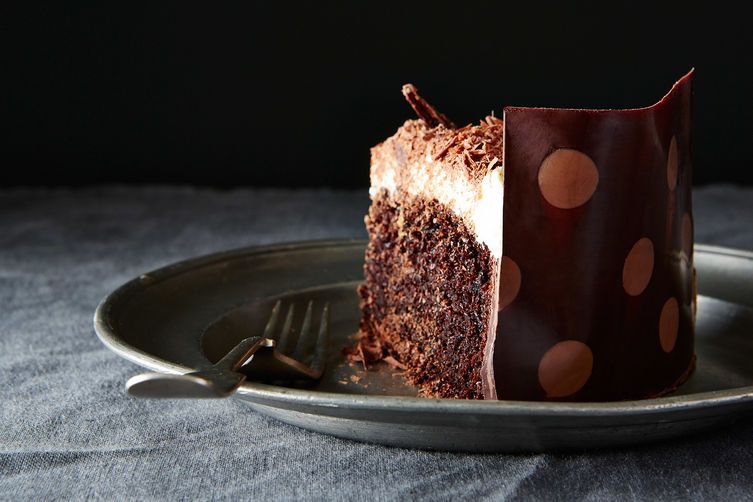
Finish it off. For me, there is nothing better in the world than chocolate cake topped with whipped cream. The chocolate wrapping makes a prominent edge around the outside of the cake, with the top just begging to be filled with something — jam, frosting, or (if you’re a real chocolate freak) ganache would all work, too. Then, I like to finish it all off with some (easy) chocolate shavings. Grab a big bar of chocolate and use a knife or (my favorite) a bench scraper to make shavings by moving the tool back and forth in quick, short motions. These a very fine, thin chocolate shavings, which are easier to make than the big, pretty ruffles — but I love them because they just melt in your mouth.
Then slice that bad boy and grab a fork.
Chocolate-Wrapped Chocolate Cake
Makes one 8 inch cake
2 cups all-purpose flour
1/2 cup very dark cocoa powder
1 3/4 cups granulated sugar
1 1/4 teaspoons baking powder
1 3/4 teaspoons baking soda
Pinch cinnamon
1 teaspoon salt
1 1/2 cups buttermilk
1/2 cup warm water
2 eggs
1/2 cup melted butter
1 teaspoon vanilla extract
3/4 cup cocoa nibs (optional)
3 ounces milk chocolate, melted
5 ounces dark chocolate, melted
1 cup heavy cream
2 tablespoons superfine sugar
1/2 teaspoon vanilla extract
Chocolate shavings, for garnish
See full recipe (and save and print it) here.
And you can get the pedestal to put it on!
Photos by Mark Weinberg
Nguồn: https://mcspiedoboston.com
Danh mục: Food