Mcspiedoboston now shares with you the article How to Build a Copper Clothing Rack at Home on our Food cooking blog.
Bạn Đang Xem: How to Build a Copper Clothing Rack at Home
As satisfying as a well-written recipe, a smart and thoughtful DIY is our kind of lunch break reading. Bonus points if it’s an easy project AND teaches us how to make something beautiful.
Today: Madelynn Hackwith Furlong of Wide Eyed Legless shares her incredibly luxe-looking clothing rack that can be put together without power tools — all you need is a little glue.

When my husband and I moved into our first apartment, one of my first priorities was to design a beautiful clothing rack. I couldn’t find the type I wanted for sale, so I designed this one to drop from the ceiling, creating a beautiful visual display in our bedroom in addition to doubling our much-needed extra storage. Working with copper piping was easier than I thought, and a relatively cost-effective way to build a simple, attractive piece.
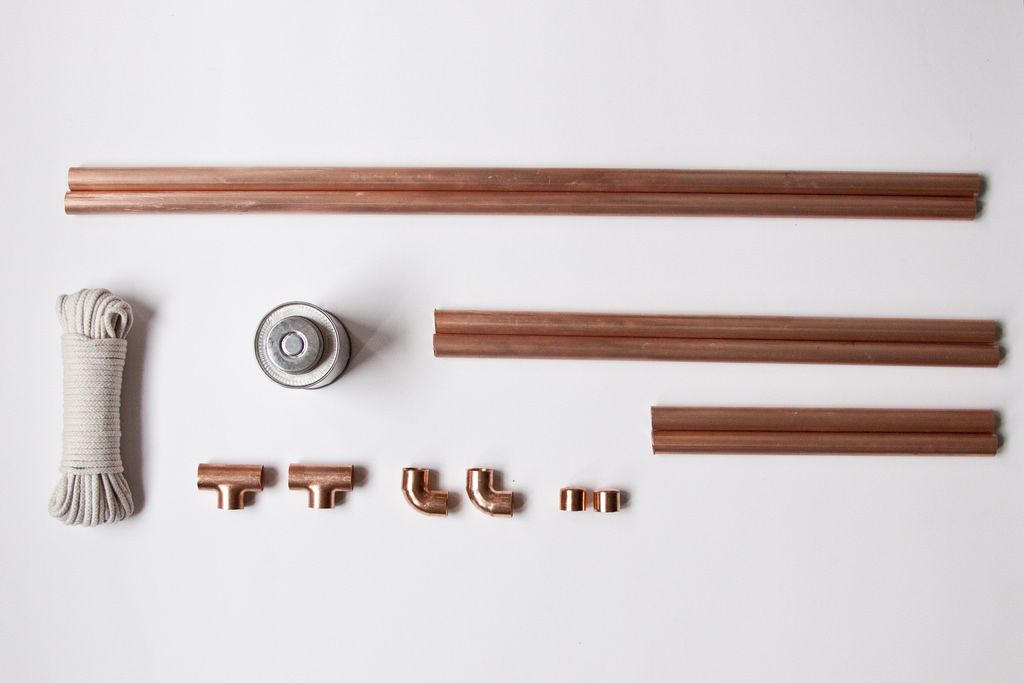
What You’ll Need:
Two 24-inch copper pipes (the ones I used were 5/8-inch wide)
Two 9-inch copper pipes of the same width
Two 14 1/2-inch copper pipes of the same width
2 copper pipe tees (T-shaped connective units with 3 openings) of the same width
2 copper pipe elbows (macaroni-shaped connective units with 2 openings) of the same width
2 copper pipe caps (end pieces) of the same width, with a 1/8-inch hole drilled through the end of each
One 1/8-inch thick cotton rope, long enough to attach to your ceiling on either side of the hanger so that it is suspended at eye-level (I used a 14-meter piece)
All-purpose cement glue
2 ceiling hooks
Xem Thêm : What I Will—& Won’t—Regret About My Pandemic Wedding
How to Build It:
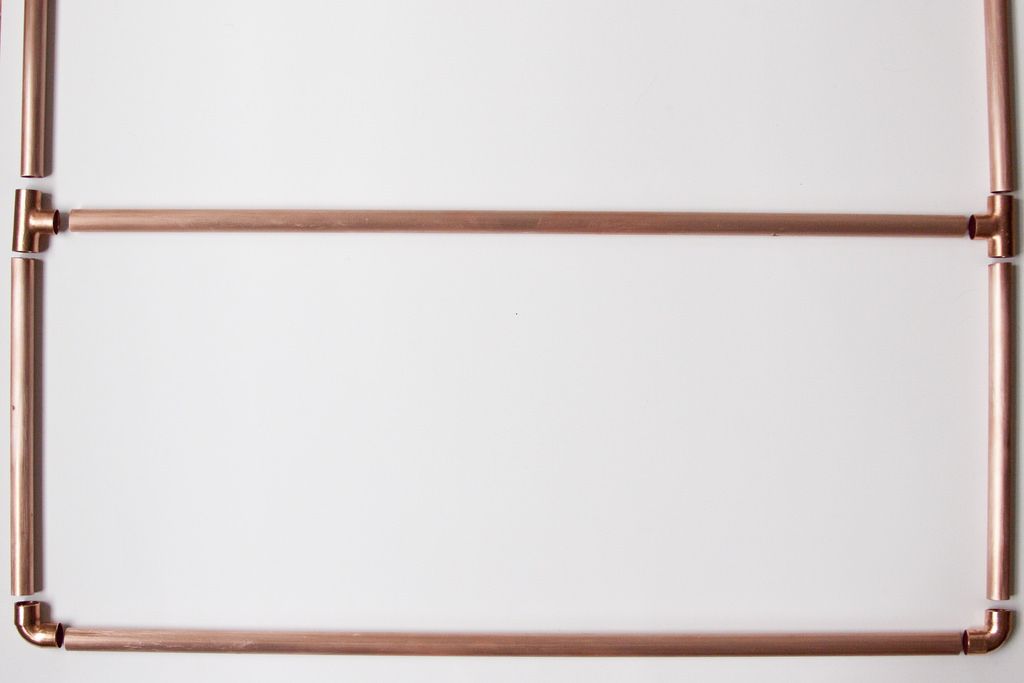
1. Start by laying everything out in the order pictured below: with your 24-inch pipes placed horizontally, the 9-inch pipes placed vertically and in between them, the 14 1/2-inch pipes placed vertically and nearest the top, and with the tees and elbows acting as connectors. Visualizing it this way will give you confidence and ensures that you can accurately put the hanger together on the first try.
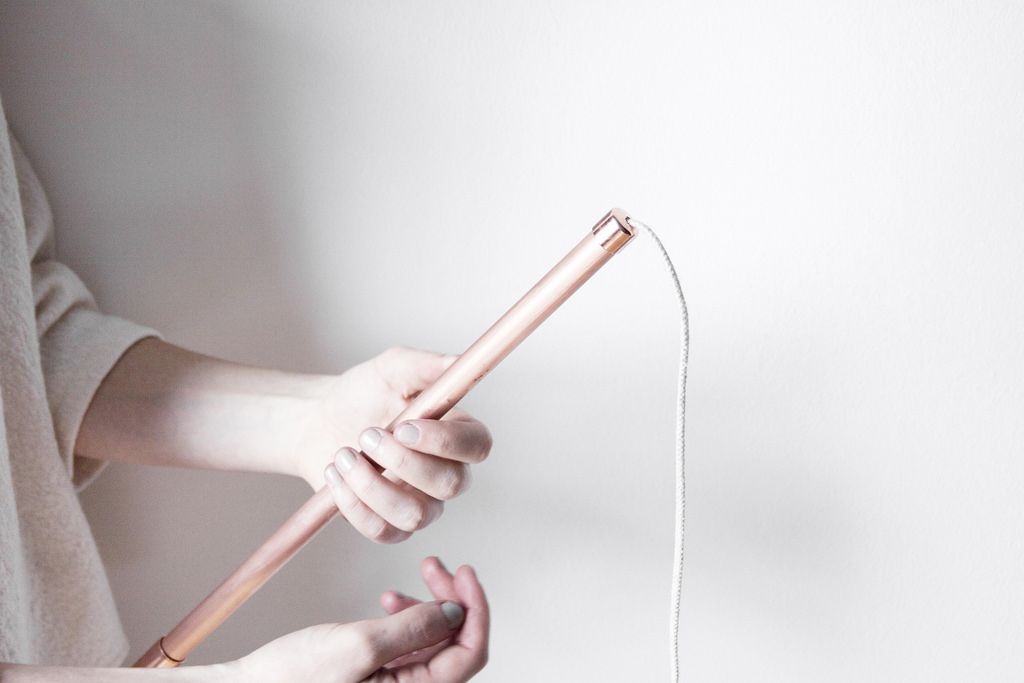
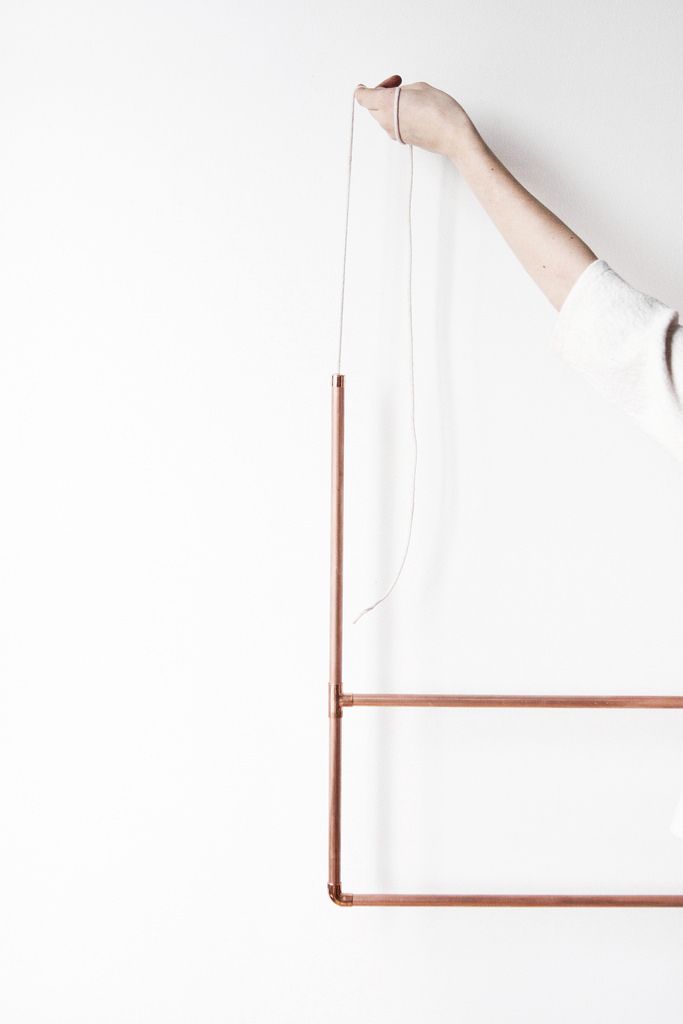
2. To begin, take one of the copper pipe caps and string one end of the rope through the hole, and then through the first 14 1/2-inch piece of copper pipe. Glue the two pieces of copper together so the cap fits on the pipe. Congrats! You can build things.
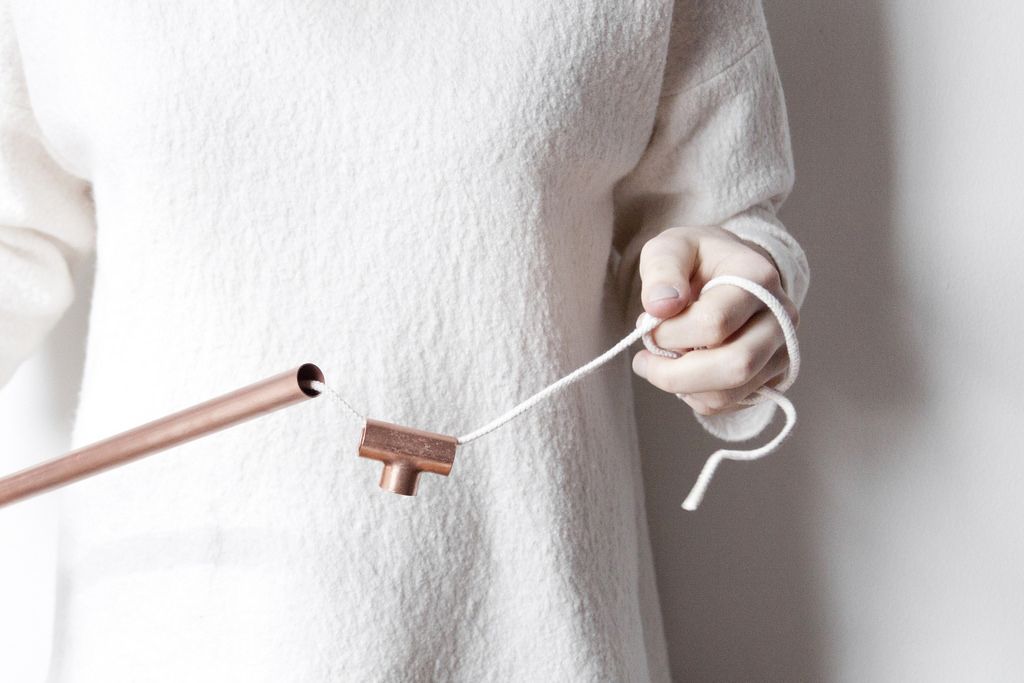
3. Thread and glue the copper tee to the open end of the pipe, making sure to face the trunk of the T inward, and pull the rope through. Satisfying, no?
4. On the open end of the tee, add and glue a 9-inch copper pipe.
Xem Thêm : A Novice-Friendly, Rose-Infused Rice Pudding From Turkey
5. Next, add a copper elbow, turned inward, and the first 24-inch copper pipe, gluing the copper pieces together and pulling the rope through as you go. You’re halfway there.

6. Now work your way through the other side, starting with the other elbow and ending with the second copper cap, pulling the rope completely through.
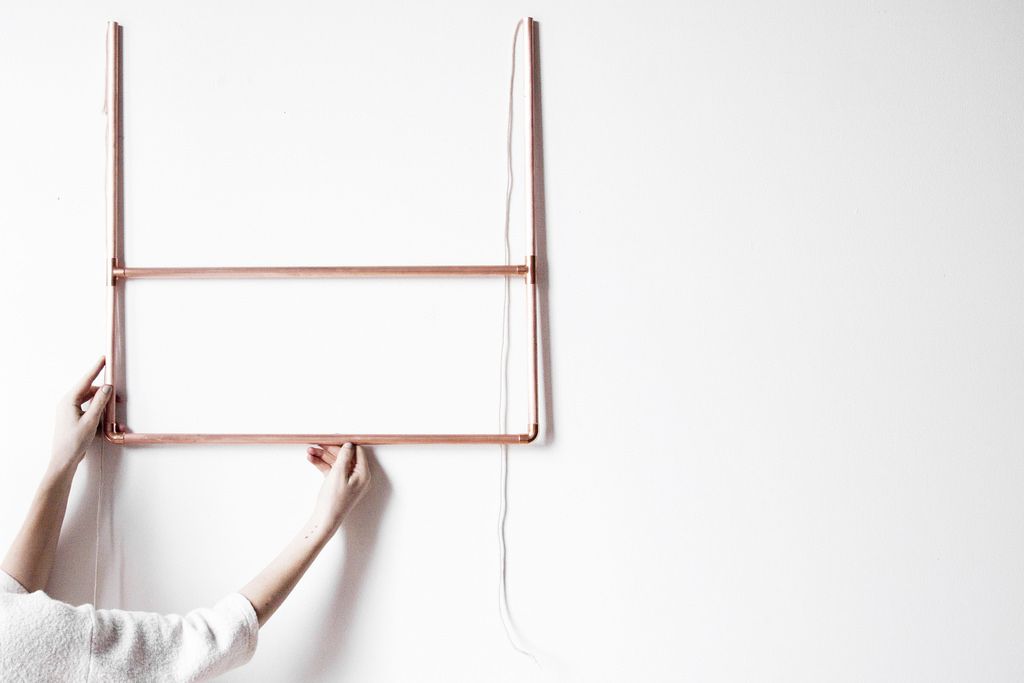
7. Once you have the outside frame complete, glue the other 24-inch copper piece into place between the two tees. Let the glue set if it isn’t already dry — this requires patience, but it’s important!
8. Voilà! Your very own handmade clothing rack. Attach your hanger to the ceiling by knotting the rope to sturdy hooks that have been installed with anchors (or any exposed beams that can bear weight), and you’re good to start hanging and displaying your prettiest clothing.
Do you love to DIY? Tell us in the comments what other projects you’d like to see here. Tag your favorites on Instagram with the hashtag #F52home.
Photos by Madelynn Hackwith Furlong
Nguồn: https://mcspiedoboston.com
Danh mục: Food